Key takeaways
- Type I: Designed primarily to reduce the force of impacts to the top of the head, such as a tool or material falling from above.
- Type II: Designed for top impact and additional lateral-impact protection. This is relevant where a worker may strike a wall, beam, vehicle, or other object from the side.
Best Hard Hats for Comfort and Jobsite Safety
The best hard hats for all-day wear are the ones with the correct ANSI/ISEA rating for the hazard, a six-point suspension that fits securely, useful ventilation for hot work, and a low enough weight that you will not be tempted to wear them incorrectly.
Quick picks by jobsite situation
| Situation | Best choice | Why it fits the use case | Trade-off |
|---|---|---|---|
| General construction and utility work | Type I, Class G or E, six-point suspension | Balanced protection, easy adjustment, and broad availability | Type I does not provide the same lateral-impact coverage as Type II |
| Work involving falling objects plus side impacts | Type II helmet with chin strap | Designed for top and lateral impact protection and better retention | Usually heavier and more expensive |
| Electrical work around energized equipment | Class E helmet, with the voltage rating confirmed on the label | Provides the highest electrical classification in ANSI/ISEA Z89.1 | Ventilated models may not be appropriate for this hazard |
| Hot indoor or outdoor work with no electrical exposure | Vented Class C helmet, if the employer permits it | Airflow can reduce heat buildup and improve comfort | Class C offers no electrical protection |
| Frequent climbing, bending, or work in windy conditions | Low-profile Type II helmet with four- or six-point suspension and chin strap | Improved retention helps prevent the helmet from shifting or falling off | Chin straps and suspension components require regular inspection |
Understand the ratings before comparing comfort
ANSI/ISEA Z89.1 ratings describe the helmet’s impact and electrical performance. They are not interchangeable, and a comfortable helmet with the wrong class is not a suitable choice.
Our top picks


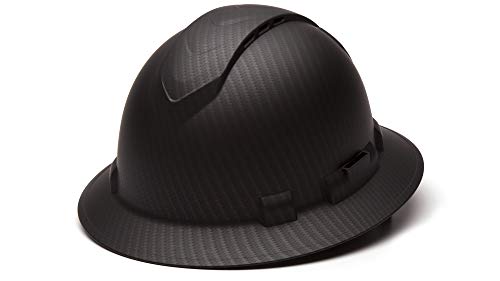
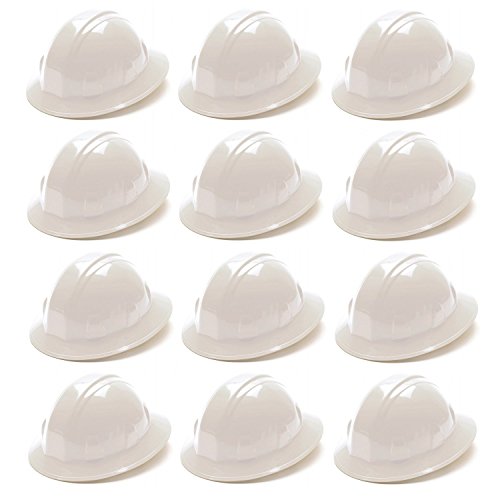
As an Amazon Associate we earn from qualifying purchases at no extra cost to you. Ratings are shown as listed on Amazon.
Type I versus Type II
- Type I: Designed primarily to reduce the force of impacts to the top of the head, such as a tool or material falling from above.
- Type II: Designed for top impact and additional lateral-impact protection. This is relevant where a worker may strike a wall, beam, vehicle, or other object from the side.
Type II helmets are often a better choice for construction, demolition, tower work, and mobile-equipment environments where the head can move into an object. They can also be less airy or slightly heavier because of their additional protective structure.
Class G, E, and C
| ANSI class | Electrical performance | Typical use | Important limitation |
|---|---|---|---|
| Class G | Rated for general use and tested at 2,200 volts | General construction and some utility tasks | Not a substitute for an employer’s electrical hazard assessment |
| Class E | Rated at 20,000 volts | Electrical utility and higher-voltage work, when specified | The rating does not make contact with energized equipment safe |
| Class C | Conductive; no electrical protection | Non-electrical work where ventilation is valuable | Do not use where electrical contact is a foreseeable hazard |
Look inside the shell for the manufacturer’s markings, including the applicable standard, type, class, and date or production information. Follow the employer’s policy if it requires a higher classification than the minimum suggested by the task.
Suspension style matters more than shell appearance
The suspension is the webbing and adjustment system that holds the shell above your head. It absorbs and distributes impact energy, creates a cushion of air, and determines whether the helmet stays positioned during movement.
- Six-point suspension: Usually provides more evenly distributed support than a basic four-point design and can feel more stable during long shifts.
- Four-point suspension: Often lighter and simpler, with fewer parts to replace. It can be comfortable when correctly adjusted but may feel less balanced on some head shapes.
- Ratchet adjustment: Allows quick tightening with one hand and is convenient when wearing gloves. It may add a small amount of weight at the rear.
- Pin-lock adjustment: Uses holes and a strap position rather than a dial. It is simple and lightweight but slower to adjust.
- Chin strap: Valuable for climbing, elevated work, windy conditions, and tasks that involve frequent bending. Use a strap designed for the helmet rather than improvising one.
A good fit is snug without causing pressure points. The front suspension should sit low enough to keep the helmet stable, while the shell should not rest directly on your head. Tilt the helmet only as far as the manufacturer permits; excessive backward tilt can reduce coverage and make the brim ineffective.
Venting and weight for hot-weather wear
Vents can improve airflow, but they also affect electrical classification and jobsite suitability. A ventilated Class C helmet may be excellent for hot, non-electrical work, while a non-vented Class G or E model is the safer direction around electrical hazards. Never add holes or modify the shell to improve airflow.
For all-day use, compare the complete worn weight rather than the shell weight alone. A face shield, earmuffs, headlamp, winter liner, and chin strap can add several ounces. As a practical comparison:
| Configuration | Approximate added weight | Comfort implication |
|---|---|---|
| Basic suspension and shell | 12–16 oz | Usually the least tiring configuration for general work |
| Ratchet suspension, chin strap, and accessories | 16–24 oz | More stable and versatile, but rear and side pressure matter more |
| Helmet with face shield, earmuffs, and headlamp | 24–36 oz or more | Check balance carefully; front-heavy setups can cause neck fatigue |
These are useful comparison ranges, not certification limits. Manufacturer specifications and accessory choices vary. A helmet that weighs 2 ounces more but stays centered may feel better than a lighter model that shifts constantly.
Reliable helmet styles to consider
Classic full-brim hard hats
Full-brim designs extend protection around the sides and back and can shade the face and neck from sun or rain. They are a strong choice for outdoor construction, roofing, and utility work. The wider brim can interfere with some face shields, earmuffs, or tight spaces, so confirm accessory compatibility before buying.
Front-brim or cap-style helmets
Cap-style helmets are often lighter and provide better upward visibility in confined areas. Models from established manufacturers such as 3M, MSA, Klein Tools, and Milwaukee are commonly available in several suspension, venting, and rating configurations. Do not assume that every model from a brand has the same Type, Class, or accessory compatibility; check the exact model marking.
Modern Type II safety helmets
These helmets typically use a more secure suspension, a deeper shell, and often a chin strap. They are worth the additional cost when lateral impacts, climbing, or helmet retention are significant concerns. Some have integrated eye protection, earmuff mounts, or accessory slots, but every attachment should be approved for that helmet.
How to set up a hard hat correctly
- Inspect the shell. Reject it if it has a crack, deformation, deep gouge, chemical damage, or unauthorized drilling.
- Install the suspension correctly. Match the front and rear clips to the shell’s attachment points and ensure each clip is fully seated.
- Adjust the circumference. With the ratchet or strap loosened, place the helmet level on your head and tighten it until it stays in place without creating a painful pressure band.
- Check movement. Nod, look upward, and turn your head. The shell should remain centered without obstructing vision.
- Fit the chin strap if required. It should be snug beneath the chin, not loose enough to allow the helmet to roll off.
- Recheck after accessories are added. Face shields and earmuffs can change balance and clearance.
Ownership, cleaning, and replacement realities
The suspension usually wears out before the shell. Sweat, ultraviolet exposure, repeated adjustment, and laundering can weaken webbing and foam brow pads. Replace the suspension when webbing is frayed, stretched, stained with chemicals, or no longer holds a reliable adjustment. Keep a spare suspension available if the helmet is used daily.
Clean the shell and suspension with mild soap and warm water, then air-dry them completely. Avoid solvents, gasoline, strong detergents, paints, stickers that cover required markings, and unapproved heat sources. Do not store a helmet on a vehicle dashboard or in a hot truck cab, where prolonged heat and sunlight can accelerate material aging.
Replace a helmet after a significant impact, even if damage is not visible. Also follow the manufacturer’s replacement guidance and the employer’s inspection schedule. A common mistake is treating the shell as permanent equipment while ignoring the suspension, accessories, and electrical markings.
Bottom line
For most general jobsites, choose a correctly rated Type I or Type II helmet with a six-point suspension, a comfortable ratchet, and a replacement suspension that is easy to obtain. Choose Type E when electrical hazards require it, and choose a ventilated Class C model only for work where electrical protection is not needed. Prioritize stable fit, complete worn weight, and approved accessories over appearance or the lowest purchase price.